The Sun
Submitted
by: Sharon
Freer
Email:
sfreer@njcu.edu
School/University/Affiliation:
NJCU
Date: June 28, 2009
Subject(s):
 Science (Astronomy and Space Science)
Topic of the Lesson
The Sun
Grade Level
Grades 2-3
Duration
Five 40 minute Sessions
OBJECTIVES:
At the end of the lesson, students will:
Know the definitions of the terms that relate to the sun
Know the sun is the closest star to our planet
Understand that the sun is a ball of hot gas
Is far away from the Earth and is much bigger than the Earth
Understand how different colors absorb light and feel warmer than others
Understand the patterns of day and night as they relate to the sun
NJ CCCS
Standard 5.9 (Astronomy
& Space Science) All students will gain an understanding of the origin, evolution, and structure of the universe.)
Descriptive Statement: The study of science should include a study of the planet Earth and its relationship to the rest of the
universe. This standard describes what students should know about astronomy and space science. By the end of Grade 2, students will:
A.
Earth, Moon, Sun System
- Recognize that the sun supplies light and heat to the Earth.
- Observe the patterns of day and night and the movements of the shadows of an object on the Earth during
the course of a day.
Description of the Lesson: Through a variety of activities, students
will learn that the sun is a star, that it gives us light and heat, and what makes day and night.
Procedures:
Reach the story “Sun Up, Sun Down” by Gail Gibbons.
Do a K-W-L chart to discuss what students know about the sun.
Learn about the size, distance and make-up of the sun.
Participate in an activity that will help understand that the sun produces heat and light.
Participate in an activity that will help understand why reasoning for night and day.
Activities:
Have the students draw a picture of the sun and write a few sentences of what they
know
about the sun.
Show the class the pictures located at the following websites:
http://umbra.nascom.nasa.gov/images/
http://science.nationalgeographic.com/science/space/solar-system/sun-article.html
Students will perform an exercise in which they learn how the heat
and light of the sun, affect things here on earth.
 See Activity at end of lesson plan: Do Different Colors Absorb Heat Better?
Students will participate in an exercise that will help explain how the rotation of the Earth creates
day and night.
See Activity at end of lesson plan: What Makes Day and Night?
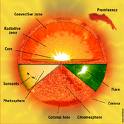
Vocabulary
Students will learn the vocabulary
words associated with the sun:
corona star
planet
gas
sphere sunspot solar flare
diameter
rotation revolution
sunrise sunset
Assessment:
Students will complete “The Sun” worksheet as a homework assignment.
Students will complete the Night & Day worksheet as a homework assignment to assess their understanding
of the Earth’s rotation.
Students will take a quiz on the vocabulary words associated with the sun.
Students will be assessed on their class work regarding how the color of a material affects heat
absorption.
Students will be assessed on their class work on the lesson on: What makes Day and Night? Students
will be asked to graphically depict their understanding of how the rotation of the Earth and Sun affect day and night.
Final Assessment will be in the form of a 25-question, multiple choice test that will be based
upon the vocabulary and concepts learned throughout the lessons.
Technology:
Smartboard
One computer with an Internet connection
Materials:
Globe
Paper
Light bulb
Stickers
Ice cubes
Colored paper
Lamp
Wrap-around map
Background
The
sun emits energy in the form of electromagnetic waves. We see part of the electromagnetic wave as light and we feel part of
it as warmth. Darker colors absorb more sunlight than lighter colors, which is why darker colors get warmer more quickly in
the sunlight than lighter colors. The lighter colors reflect more of the sun's radiant energy, so they remain cooler to touch
in the sunlight.
Preparation
1. Make
enough ice cubes so that each group can have four. Try to make them the same size so that the experiment is consistent.
2. Cut
out the colored paper into 5 sided boxes big enough to fit the ice cube for each group. To save class time, tape the boxes
together, or if time is available have the students cut, fold and tape their own boxes together.
3. Obtain
the rest of the materials.
4. Photocopy one chart per group
5. For
shorter lesson, precut and assemble colored boxes
With Students
1. Ask
them to imagine that it is 100-degrees outside. What kinds of things will they do to stay cool? What kinds of clothing will
they wear? Any thought to color? Once the class is thinking about the influence of color and its relationship to heat:
2. Divide
the class into small groups.
3. Hand
out newspaper and have each group spread the newspaper under the heat lamp or in a sunny place outside.
4. On
the newspaper, place the boxes side by side with the opening facing away from the sun/light so the students can see inside.
5. Give
each group 4 ice cubes and instruct them to place 1 ice cube in the center of each colored cube.
|
Let the ice cubes sit in the sun until they have melted. Have the students check on them every few minutes and
record which ice cubes melted first, second, third, and fourth. |
|
click for copyright
|
6. Instruct each group to record their data on the chart.
7. Discuss
with the class their observations, touching on the different colors and their ability to reflect light and heat. Also, talk
about how these characteristics of color help to melt the ice.
·
Why do ice cubes melt?
·
How does the sun affect ice?
·
What kind of clothes do people wear
outside in the winter/summer?
·
On which color did the first ice
cube completely melt? Why?
·
If an ice cube was placed on a blue
piece of paper, how much time do you think it would take to completely melt?
·
Which color absorbs heat the quickest
in the sun?
·
Which color would be the best to
help keep ice cubes from melting too quickly in the sun?
CREDIT: http://teachengineering.org/view_activity.php?url=http://www.teachengineering.org/collection/wpi_/activities/wpi_colors_absorb_heat_better/colors_absorb_heat_better.xml#assessment
- Discuss what students already know about
night and day.
- Teach students about the rotational cycles
of both the sun and the Earth.
- Review the vocabulary (sunrise, day, noon,
sunset, night, spin and rotation).
- Darken room and turn on lamp. Explain that
the lamp represents the Sun.
- Ask a student to be the Earth. Place the
wrap-around map around the student so that your town is on his/her chest. Make sure he or she can be seen by all students.
- Mark your town with a sticker and ask students
to focus on it as the Earth rotates.
- Have student begin with his/her back to the
lamp (night). Ask students if they think it is day or night in their town.
- Have student rotate slowly in a counterclockwise
fashion, until his/her left arm is pointed to the Sun. Ask students if they think it is sunrise or still night.
- Student continues the counterclockwise rotation
until he/she faces the Sun directly. Ask students what time it is now in their town. Students can see that it is noon, the
middle of the day, when we get the most light from the Sun. You may need to prompt with additional questions.
- Ask student to rotate a little more. Have
him/her stop when his/her right arm is pointed toward the Sun. Ask students what time of day it is. They should be able to
tell you that it is sunset.
- Complete the day/night cycle by having the
student return to his/her original position, with his/her back to the Sun. Students should be able to tell you that it is
midnight.
- Ask students to notice what time of day it
is on the other side other Earth (student’s back is facing the Sun and it is noon). Explain that one half of the Earth
is always light while the other is dark. Emphasize that it is the Earth's own shadow that makes the night side of the Earth
dark.
- Repeat this demonstration. Select other students
volunteers so that students will get a chance to view the day and night cycle several times. Explain that it takes 24 hours
for the Earth to rotate completely.
- Distribute Day and Night work sheets for
students to complete.
CREDIT: http://www.eyeonthesky.org/lessonplans/05sun_daynight.html
References:
Eye on the Sky Lesson Plans:
http://www.eyeonthesky.org/index.html
Fotosearch: Solar Flares
http://www.fotosearch.com/results.asp?keyword=solar+flares&category=&searchtype=sss
Solar Data Analysis
Center
http://umbra.nascom.nasa.gov/images/
National Geographic
http://science.nationalgeographic.com/science/space/solar-system/sun-article.html
TEACH Engineering Resources for K-12:
http://www.teachengineering.org/index.php
Teacher Vision: http://www.teachervision.fen.com/tv/tvsearch.php?keywords=the+sun&sitesearch=1
Views of the Solar System:
http://www.solarviews.com/browse/vss/VSS00031.jpg
ATTACHMENTS